6. Design Email & SMS templates
Put your logo, colours and wording on Giftnote's built-in gift emails and SMS, so you can launch without Klaviyo or another email tool.
Written By Giftnote Team
Last updated 16 days ago
Giftnote sends its own gift emails and SMS, so you can go live without connecting Klaviyo or another email tool. This article shows you how to put your logo, colours and wording on them.
Quick start: notifications via Giftnote's native email builder
Start with Giftnote's built-in notifications so nothing holds up your launch. You can switch to Klaviyo, Attentive or another tool later.
Step 1: Access notification settings
Open Giftnote from Apps in your Shopify admin, then go to Settings → Notifications.
Step 2: Set global email styling
Click Edit email design on the Email design card at the top of the Notifications page. Whatever you set here applies to every Giftnote email, so do it before you edit individual messages.
- Set your Email sender name
- Upload your brand logo (or paste a hosted Logo URL) and set its height
- Choose your brand colours
- Optionally set a font, a Reply-to address, and Use one accent colour on every email
The preview on the right updates as you go, with a tab for each delivery method (Send Now, Send Later, On delivery, On fulfillment). Save if a save bar appears.
Customising Email explains every field on this page.
Step 3: Edit your gift message notifications
Back on Settings → Notifications, you'll see the notifications grouped by feature (Gift Orders, Gift Cards, Multi Gift). A badge on each shows who receives it:
- Customer: emails to the purchaser
- Recipient: emails and SMS to the gift recipient
Start with Gift Order - Gift Message Delivered. It's the email that carries the gift message to the recipient.
Open a notification to edit its subject, banner and wording. Use Quick insert to add details such as the recipient's name or the message, and add images or links if you like.
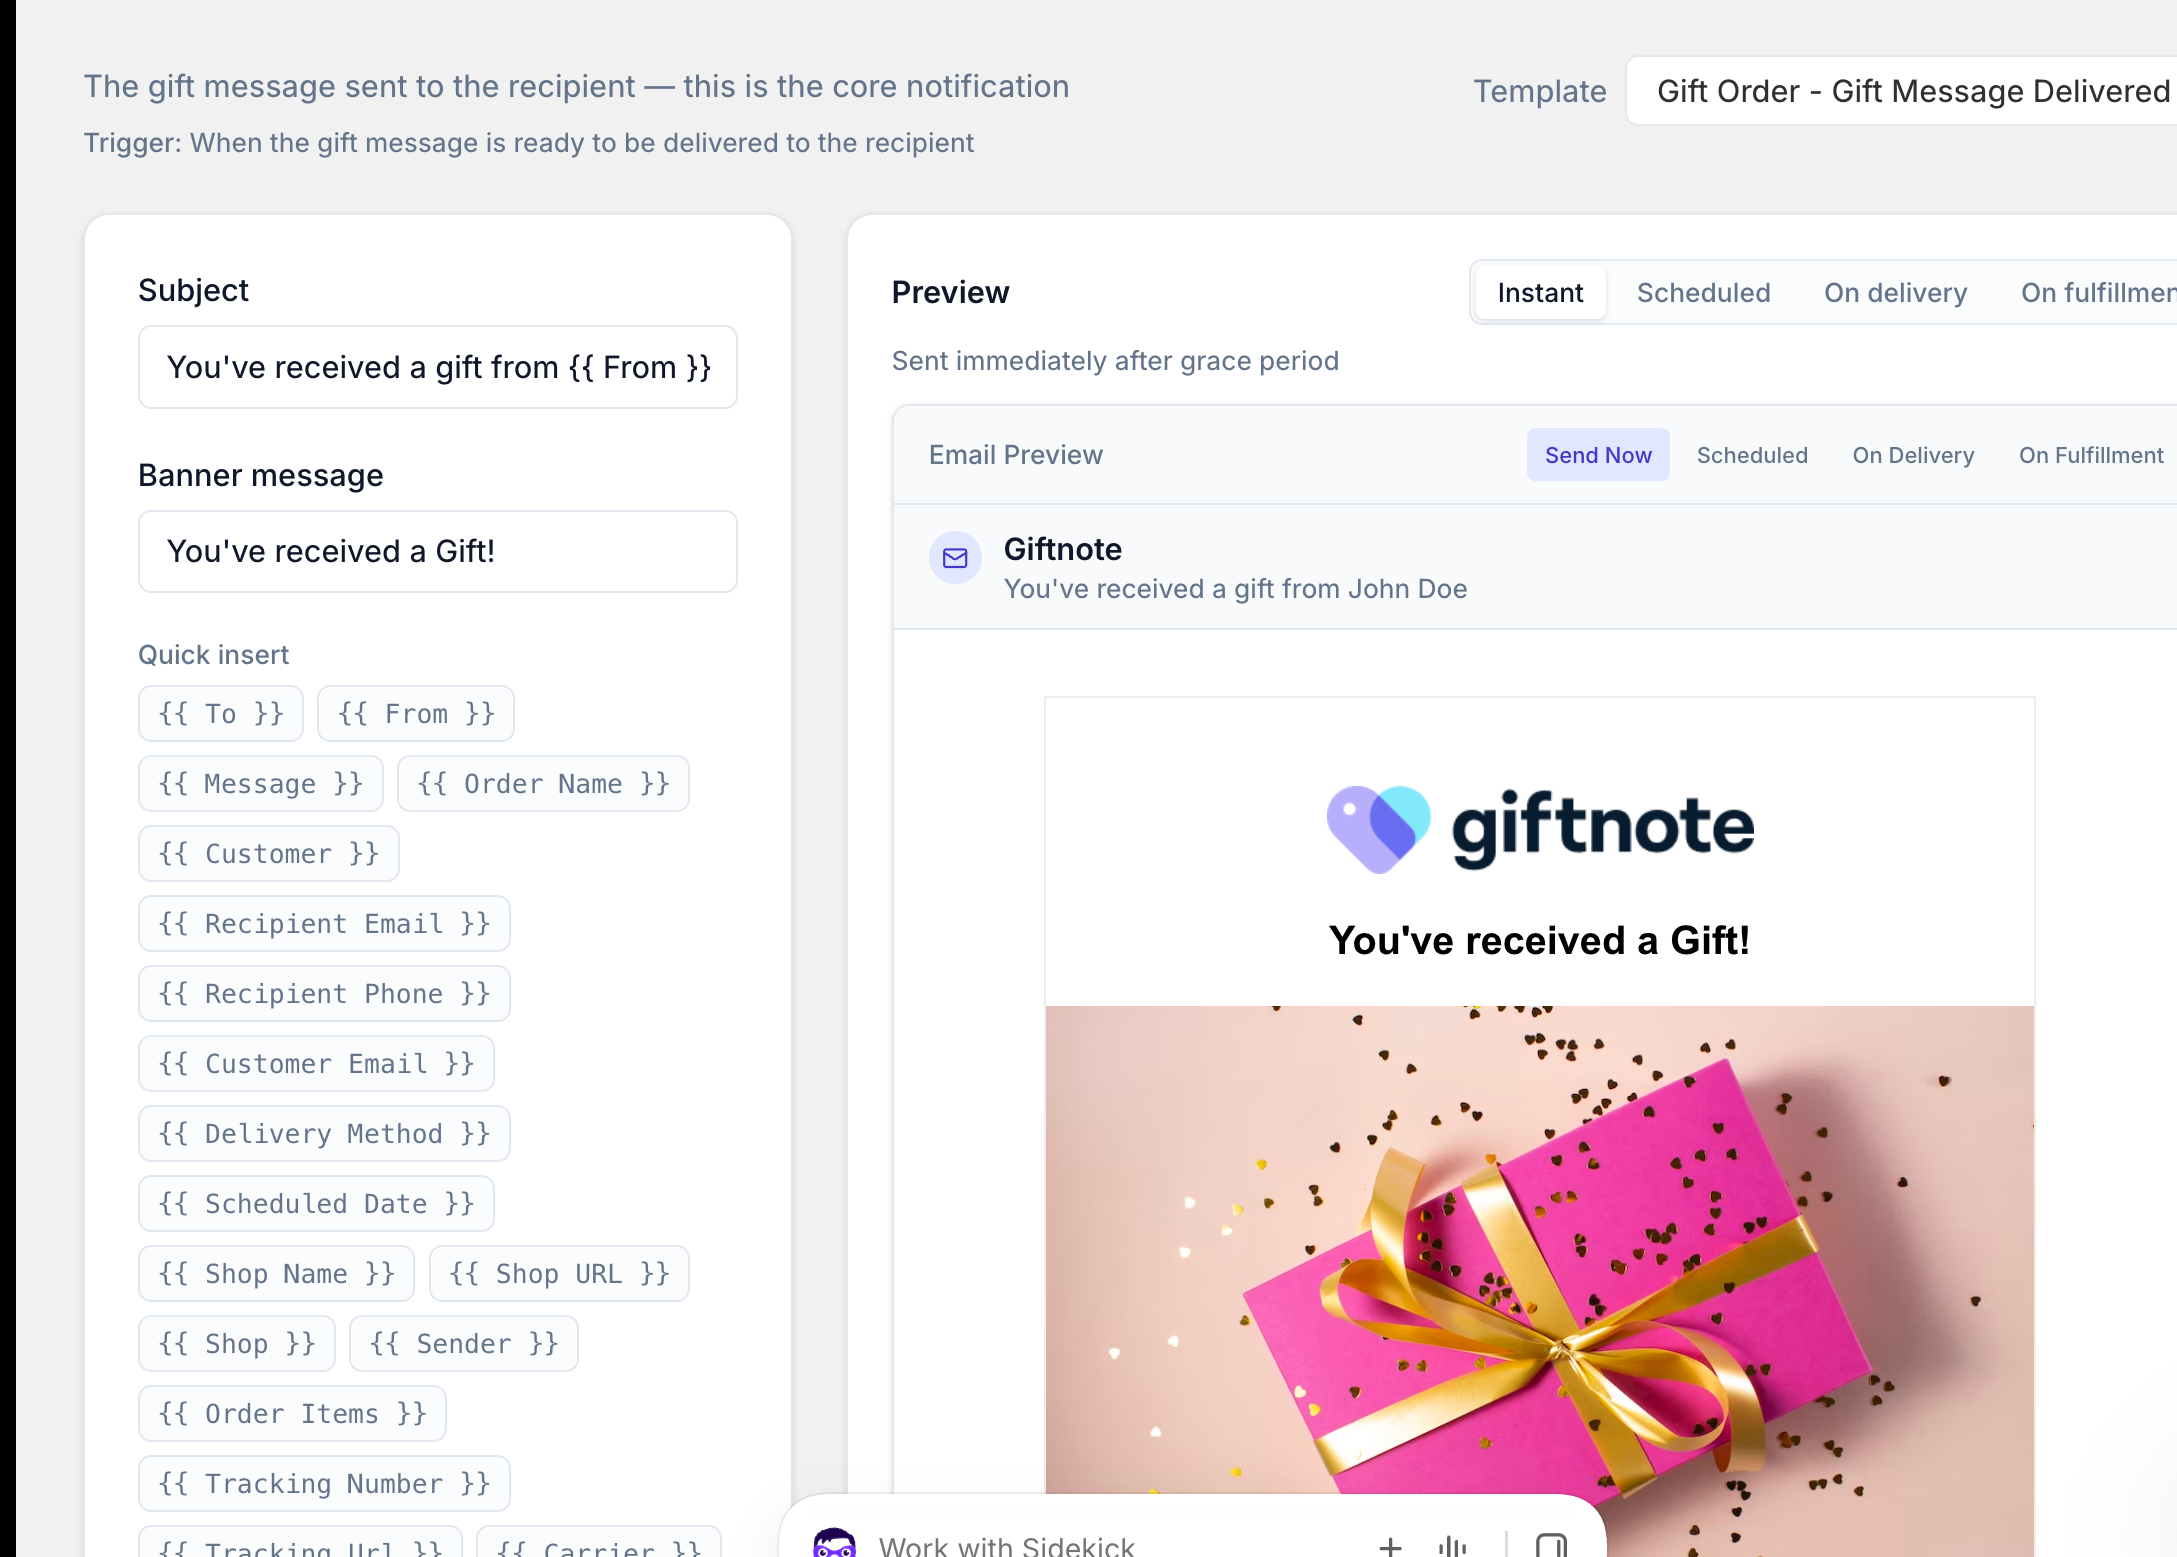
Tip: add a button or sign-up link so recipients can join your mailing list.
Step 4: Enable SMS for recipient notifications (optional)
SMS is included on the Core and Professional plans. Giftnote only sends SMS to recipients. Most recipient notifications have an SMS channel, for example Gift Order - Gift Message Delivered and Gift Card - Delivered to Recipient.
- Open one of those notifications.
- Check the SMS switch under Channels is on. Each notification has its own SMS switch. For gift orders, SMS enabled in Settings → Gift Orders → Settings must also be on, or the widget won't ask for a phone number.
- Edit the SMS text in your brand voice. You can include links.
- Save.
Customizing SMS lists the quick fields you can use.
Step 5: You're live
Once you've saved your templates, Giftnote sends the right message for each gift order. You don't need Klaviyo or any other email tool for this.
When to use an integration instead
If you want full control via Klaviyo, Attentive or another platform:
- Connect the integration. Go to Settings → Integrations, connect your tool and build your emails there. Each tool has its own guide, for example How to setup Klaviyo.
- Turn off Giftnote's emails. In Settings → Notifications, switch off the email channel on each notification your tool now sends, so recipients don't get two emails.
- Save.
SMS still sends from Giftnote, even when another tool handles your emails.
We suggest switching after launch, once your gift orders are working.
Related articles
Was this helpful?
Still need help? Share an idea