7. Add the Check Balance Widget
Add the Check balance block so customers can see what's left on a gift card: one click from Settings → Gift Cards, or place it yourself on a product or cart page.
Written By Giftnote Admin
Last updated 1 day ago
On the free plan? This feature needs the Core or Professional plan. Choose a plan in Settings > Subscription in the app, or email support@giftnote.com and we'll help you choose. Which plan do I need?
The Check balance block lets customers enter a gift card code and see how much is left on it. You add it in the Shopify theme editor (the screen where you customize your theme’s pages), on a product page, the cart page, or both.
Quick way to add it
In the Giftnote app, go to Settings > Gift cards > Overview & widget. Next to Check balance · Any page, select Open in Shopify. Your theme editor opens. Check where the block sits, then select Save. Giftnote can’t detect this block, so the Check balance · Any page row can keep showing Not detected after you add it. Select Guide on that row for help.
To place the block yourself on a product page or the cart page, follow the steps below.
Product page installation
1. In your Shopify admin, go to Online Store > Themes and select Customize.
2. In the page selector at the top of the screen (it starts on Home page), choose Products, then the template your products use. This is usually Default product.
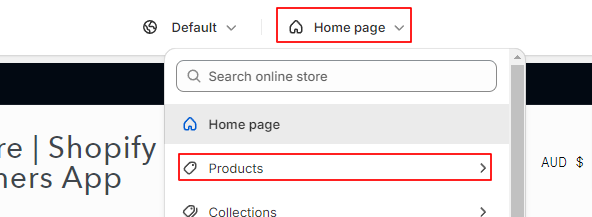
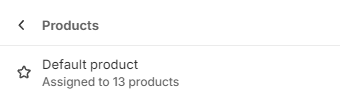
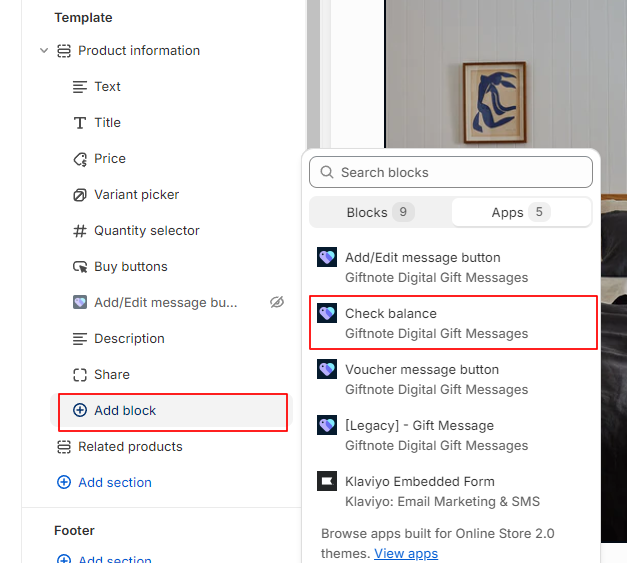
3. In the left sidebar, under Product information, select Add block. Open the Apps tab and choose Check balance.
4. To move the block, drag it up or down in the left sidebar.
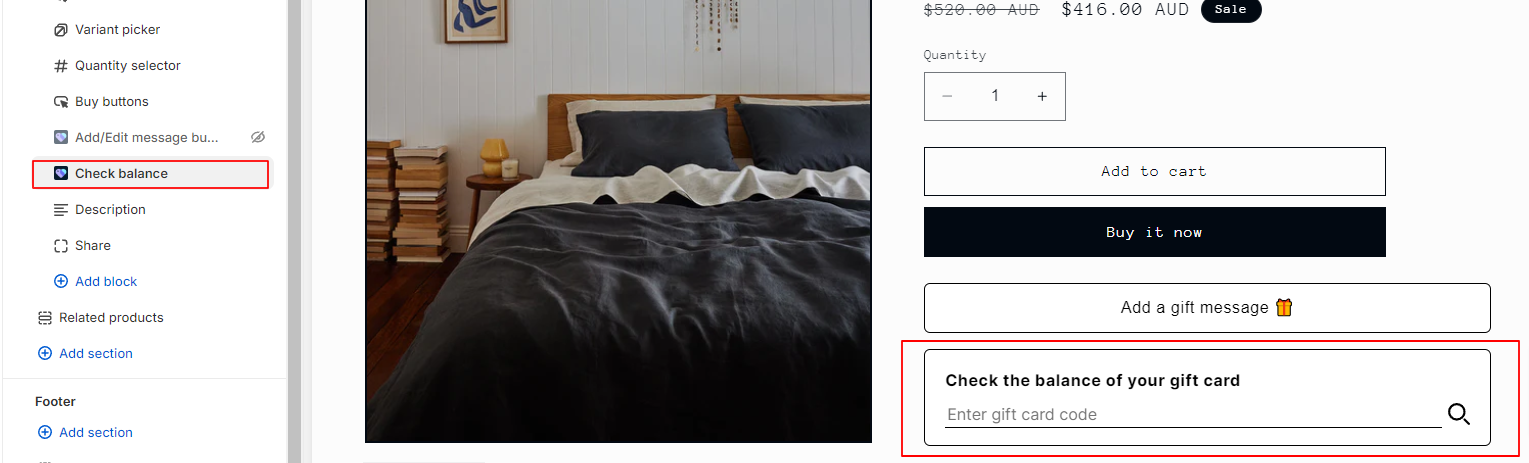
5. Select Save at the top right to make it live.

Cart page installation
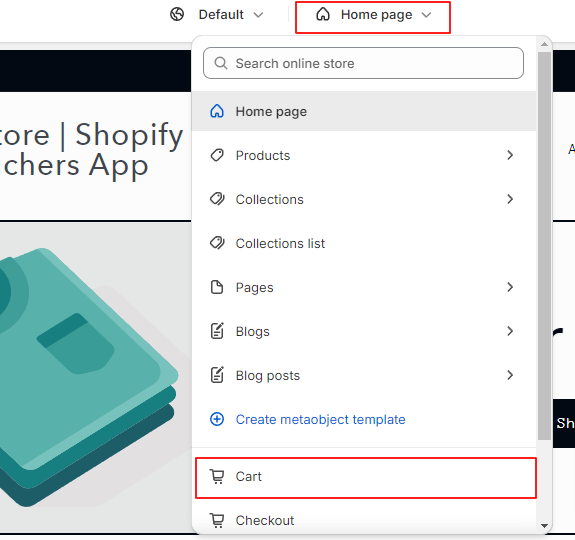
1. In the page selector at the top of the theme editor, choose Cart.
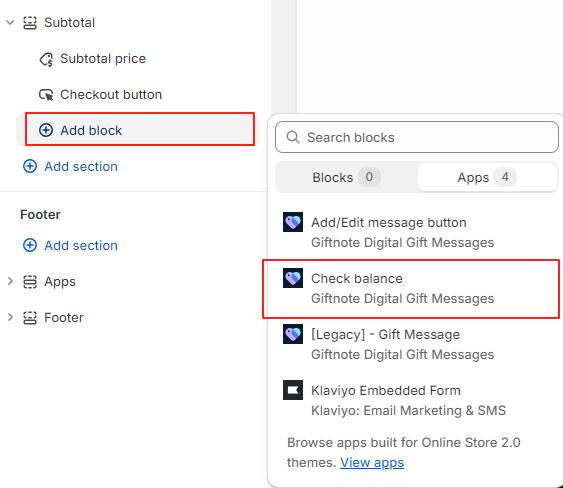
2. In the left sidebar, under Subtotal, select Add block. Open the Apps tab and choose Check balance.
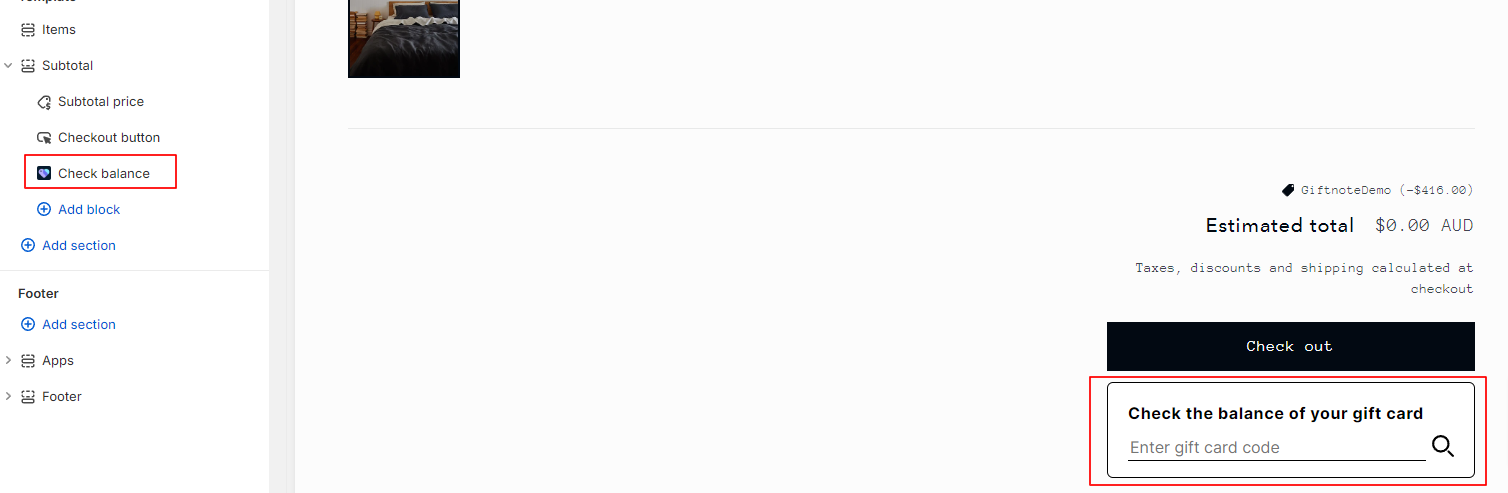
On some themes the block only shows when there's something in the cart. Add a product to your cart to preview it.
3. To move the block, drag it up or down in the left sidebar.
4. Select Save at the top right.

Customization options
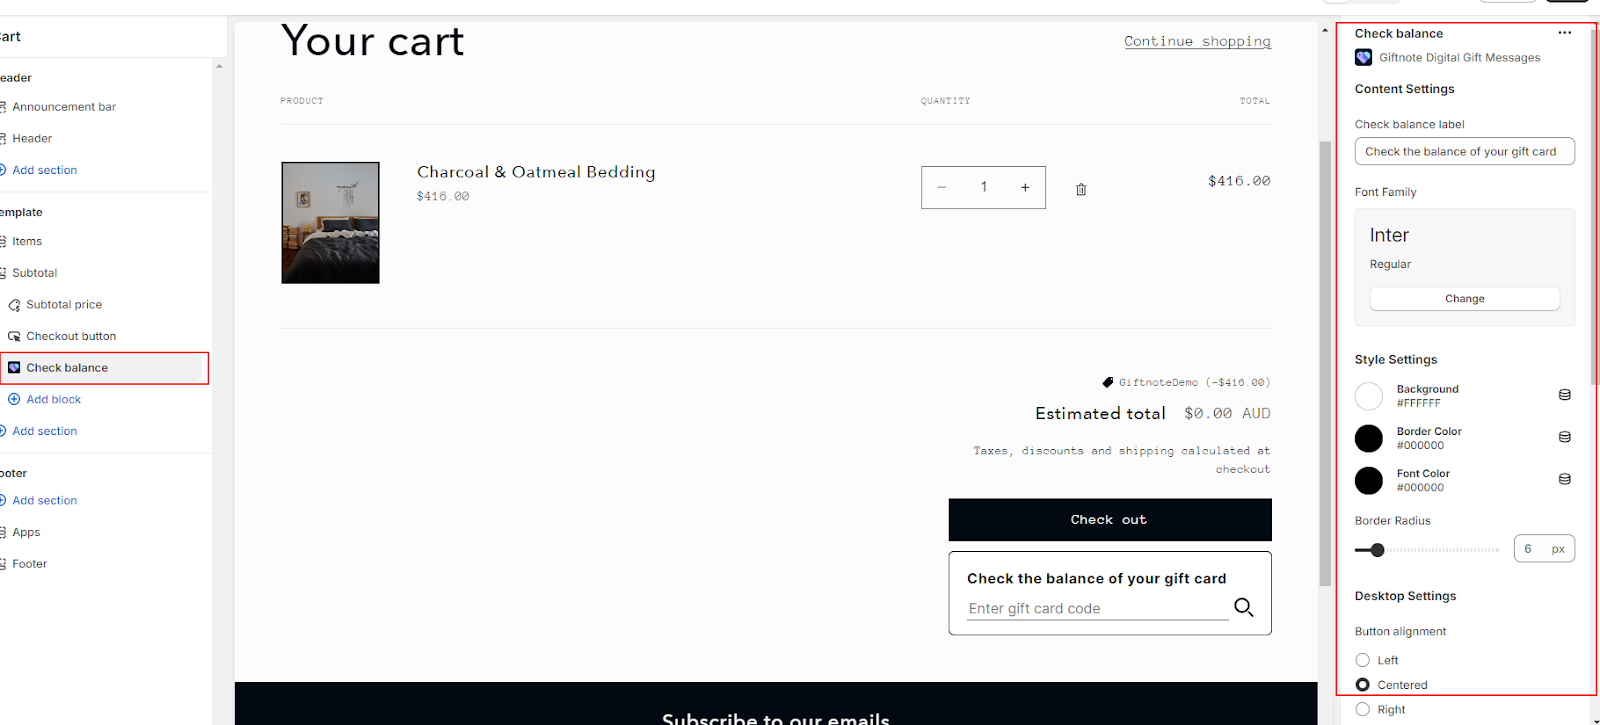
To change how the block looks, select it in the left sidebar. Its settings open on the right. If you added it to both the product and cart pages, style each one separately.
Text options
- Check balance label: the heading text.
- Font Family: the font for the whole block.
- Font Color: the color of the heading and the result. Use the color picker or type a hex code.
Block design options
Under Style Settings, set Background, Border Color and Border Radius. Use the color picker or a hex code for the colors. Border Radius goes from 0 to 50 px.
Button size and placement options
The block has Desktop Settings and Mobile Settings, each with its own alignment, width and margins. Set the Width (px), or turn on Full Width to make the block fill its section. Breakpoint Width (px) sets the screen width below which the Mobile Settings apply.
Coding options
To change anything else, add your own CSS in the Custom Styles box under Configuration, at the bottom of the block’s settings.
Related articles
Was this helpful?
Still need help? Share an idea