1. How to setup Klaviyo
Connect Klaviyo to Giftnote, send test events, choose and rename the events Klaviyo receives, and the merge fields to use in your gift emails.
Written By Giftnote Admin
Last updated 7 days ago
Connect Klaviyo and Giftnote tells Klaviyo each time a gift is ordered, delivered or received, so your gift emails go out from Klaviyo in your own designs. Each of these updates is an "event". You build a Klaviyo flow (an automated email) that starts when the event arrives.
Before you start
You will need:
- Access to the Giftnote app in your Shopify admin
- A Klaviyo login that can approve app connections for the right Klaviyo account
Connect Klaviyo
- Open the Giftnote app inside your Shopify admin.
- Go to Settings → Integrations. Find Klaviyo under Available · Marketing and select Connect. If it is already connected, it's under Connected: select Manage settings.
- Start the connection from the Connection card. Giftnote sends you to Klaviyo to approve it.
- Choose your account. If you have more than one Klaviyo account, pick the one for this store.
- Review the permissions and click Allow.
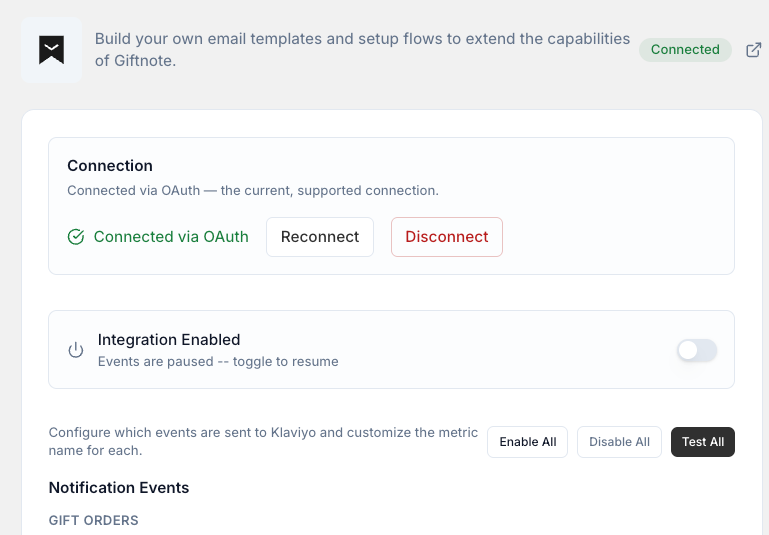
- Check the connection. Back in Giftnote, the Connection card says Connected via OAuth and shows Reconnect and Disconnect buttons.
Send test events and build your flows
- Send test events. Under Notification Events, select Test All, or Test on a single event.
- Check the events arrived in Klaviyo. Go to Metrics > Activity feed and look for the Giftnote events.
- Build a flow for each event you want to use, or email support@giftnote.com and we'll add our ready-made flows (see 4. Ready-made Klaviyo flows from Giftnote). In Klaviyo, create a flow and pick the Giftnote event as its trigger. In Giftnote, each event shows who it's for (customer, recipient or both) and which delivery options send it. For gift orders the events are Placed Gift Order, Gift Order Delivered and Received Gift Order. The full list is in Klaviyo Giftnote Events.
- Rename an event if you need to. Select Edit on an event to change the name Klaviyo receives (Klaviyo calls this the metric name), for example to match a flow you already have.
Connected Klaviyo before the September update?
Your existing flows keep working. If you used Giftnote before September 2026, your store keeps sending the old metric names Giftnote - Order Scheduled and Giftnote - Order Tracked. Both now map to Placed Gift Order. Use the current event names for any new flow.
Turn on the integration
- Choose your events. Leave the switch on for each event you have a flow for. Enable All and Disable All change every event at once.
- Turn on Integration Enabled if it is off. The card reads "Events are being sent to Klaviyo". Save if a save bar appears.
- Turn off the matching Giftnote emails. In Settings → Notifications, switch off Giftnote's own email for each gift moment Klaviyo now handles, so recipients don't get two emails.
Email merge fields for Giftnote
Merge fields are placeholders that Klaviyo swaps for the real gift details when it sends the email. Paste them into your flow emails exactly as written. Field names are case-sensitive, and a typo shows up as a blank.
Message based gifts
Use these fields for standard gift messages.
{{ event|lookup:'Scheduled Time'|default:'' }}{{ event.Message|default:'' }}{{ event.To|default:'' }}{{ event|lookup:'Delivery Method'|default:'' }}{{ event.From|default:'' }}
Together they give you the send time, message, recipient, delivery method and sender. Scheduled Time can be missing on real orders, so keep the |default:''.
Gift card based gifts
Use these fields when the order includes a gift card.
{{ event|lookup:'Gift Card Code'|default:'' }}{{ event|lookup:'Gift Card Value'|default:'' }}{{ event|lookup:'Scheduled Time'|default:'' }}{{ event|lookup:'Gift Card Sku'|default:'' }}{{ event.Message|default:'' }}{{ event|lookup:'Gift Card Expiry'|default:'' }}{{ event.From|default:'' }}{{ event|lookup:'Delivery Method'|default:'' }}
Together they give you the card code, value, SKU and expiry, plus the send time, message, sender and delivery method.
Example payloads
To see exactly what data an event sends from your store (its "payload"), select Preview on that event under Notification Events.
Related articles
Was this helpful?
Still need help? Share an idea